
For craft distillers, the key to success in product development and production is to document what you do and continuously improve your methods to help you achieve your goals more easily, cheaply and with the best possible results. Building your own lab helps you do this. It helps you to be proactive in developing new products and, when faced with a challenge, it helps you to more quickly find and fix the cause, not the symptom.
A laboratory, by definition, is a place where you do measurements, experiments and research. Often it is assumed that you need expensive and advanced machines to test your process or product. The truth is that sometimes a good thermometer can get you as far as million-dollar gas chromatography. The level of technical advancement need only match the purpose of the research. For Archimedes, his laboratory was a bathtub. For homebrewers, possibly the kitchen sink.
Louis Pasteur, who laid the groundwork for modern brewing, did most of his work with the help of some glassware and a magnifying glass. Thomas Edison started in Franklin Pope’s basement, and you can do a lot in your garage. The key is making sure to be careful and thorough to get reliable results. Use accredited laboratories for guidance, verification and more advanced analysis.
Having your own lab is more important than ever before. Our knowledge and access to information today are greater than ever, but so are the challenges from our raw materials and consumers. Two hundred years ago people did not have to worry about pesticides in their plant material or water, and they knew nothing about furfural (which was isolated for the first time by distillation of ants in 1821). Not to mention there was no FDA or TTB checking your compliance.
Progress and innovation often arises from discontent. This might come from inefficient use of raw materials or labor as well as inconsistent or unwanted end results — all of which cost the producer a lot of money. For craft distillers, we face challenges with infections, low yield, off-flavors, discolorations, flocculation and other issues.
First Step
The first step in developing your lab is to take meticulous notes. If you don’t know what you have done, you cannot improve your results. You might think you will remember, but you won’t. You can’t — it’s just too much information. Make sure to number the pages in your notebook, write the time and date and, most importantly, have backups and keep copies stored at another location.
You’re keeping records for purposes of verification and repetition, not to replace your own intuition and creativity. With all the innovations and all the machines in the most advanced laboratories, there is still no substitute for human perception. We can design machines to do a defined number of tasks, but not even all the machines in the world combined can compete with the way a human can see, smell, hear, taste and feel.
For better or worse, the human brain also combines these perceptions into a symphonic ensemble. Just imagine a beer fresh from the fermenter: Golden amber with fizzy bubbles, scents of fresh-cut lawn and light chocolate. You can hear the bubbles bursting through the dense foam when you feel the cold beverage touch your lips, and your mind rests with angels. Try to get that from a gas chromatograph — and try to make that beer again without good notes!
Safety
From day one of planning, to the latest expansion, it is important to never lose sight of safety. Take care of yourself and the people you care about. Ask a colleague or professional to do a safety audit. Simple measures can save your health and business. Protect your head, ears, eyes, hands and feet. Use CO2/EtOH detectors. Have first aid kits and fire extinguishers on hand. A CO2 monitor can run approximately $500-$2,000 depending on other instrumentation and desired integration systems.
Accuracy and Precision
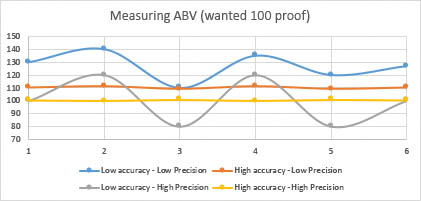
When talking about analysis, it is good to understand the difference between the terms “accuracy” and “precision.” Measurements or batches are accurate when they match a given standard. When two or more batches reliably approach, on average, a known measure over time, that’s precision. In distilling, you’ll want a high degree of both.
To illustrate accuracy and precision in the case of measuring proof, see example results in Table 1 below. If you make a whiskey at 100 proof and measure six batches, you might ideally get results of 100+/-½ proof as indicated by the purple line. You will be efficient and correct, and also your product will be TTB compliant. The green line shows variation of +/-20 proof but still an average value of 100 proof. In terms of efficiency, you’re making the same margins per proof-gallon over time, but your accuracy could get you in trouble; if your product were tested by TTB at an incorrect value, you could face fines or worse. If you analyze with low precision at the wrong value (the red line), you might just be giving money away. Keep in mind that at just one proof point higher than the stated ABV, you are giving away 1% of your bottom-line profit.
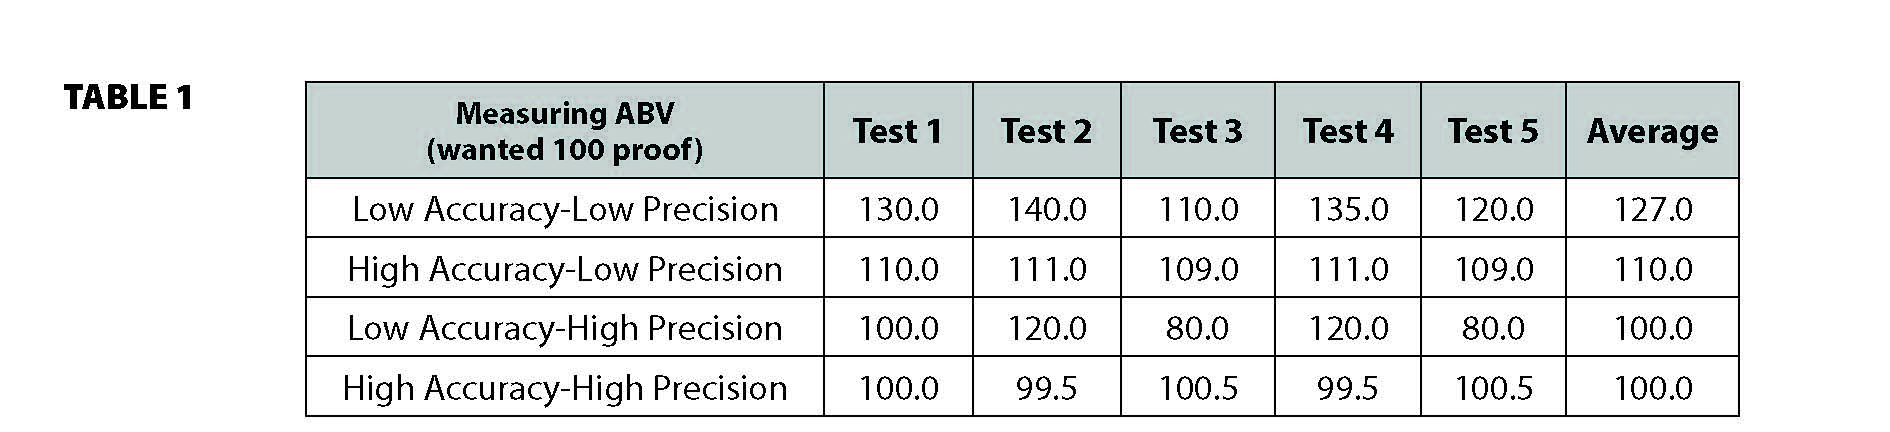
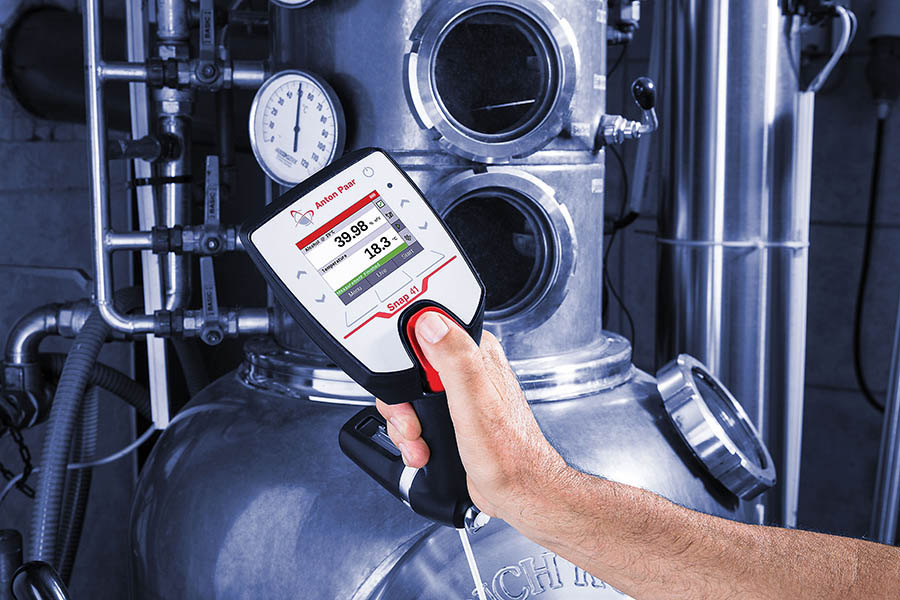
Measuring proof is done by one of three kinds of instruments: handheld densitometer (not TTB approved), hydrometer or benchtop densitometer. (Although the handheld densitometer is not TTB approved, anyone who has used a hydrometer would be hard pressed to say the digital is not the more accurate instrument.) Specific requirements pertaining to the hydrometer and thermometer can be found in 27 CFR Part 30. Both the hydrometer and thermometer must also be certified and calibrated by a third-party lab. The benchtop densitomer is the best, most accurate and TTB-approved device for determining proof.
Attention to Raw Materials
With attention to safety and good record-keeping under your belt, and with a basic concept of the importance of both accuracy and precision, you now need a process flowchart. You need to know your operation inside and out, and an easy start is to create a mind-map of your daily work from start to finish.
Start with your raw materials. You need to know that your incoming goods meet the specifications you want and are paying for. Trust is good, but control is better. With incoming alcohol, check weight and ABV. With incoming plant material, check weight as well as moisture content. If your moisture levels are too high, you pay for water, which also affects shelf life and your recipe formulation.
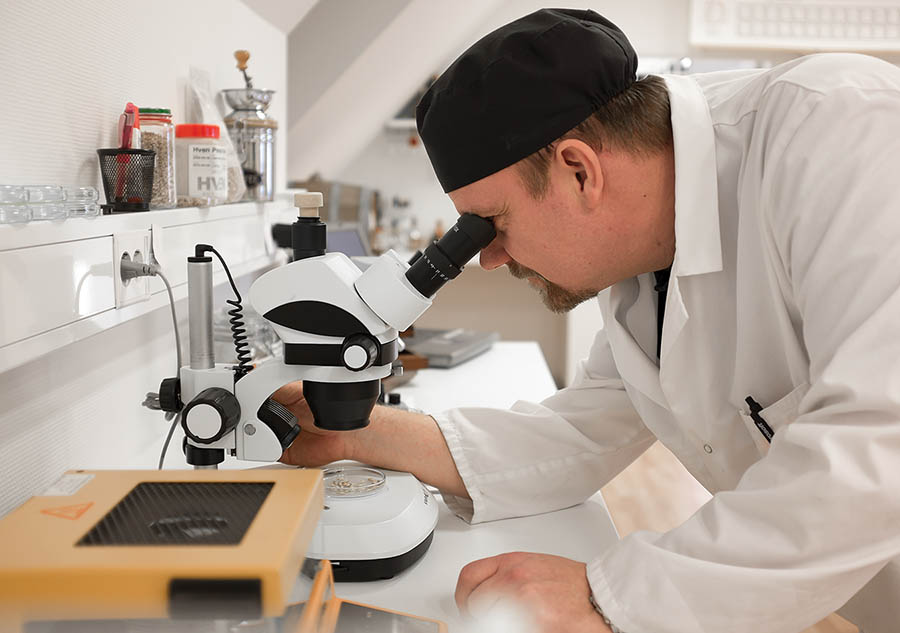
For checking moisture content of grains, reference American Society of Brewing Chemists (ASBC) “Methods of Analysis: Malt-3.” This procedure will show you all equipment required for in-house testing as well as the step-by-step procedure. Alternatively, most suppliers can provide you with this information beforehand. Sometimes with small or local suppliers/farmers they may not know this analysis or specification exists. With local farmers, if you send them the procedure and a recommendation for a lab, they may be willing to do this on an annual basis. With plant material, it is good to analyze a sample with a microscope to check for potential fungus, water damage or even biological hazards.
Mashing, Fermenting and Distilling
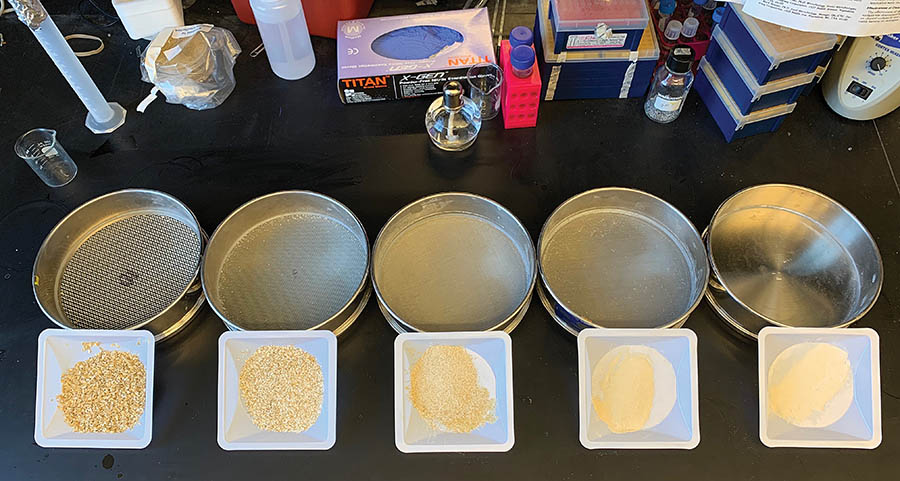
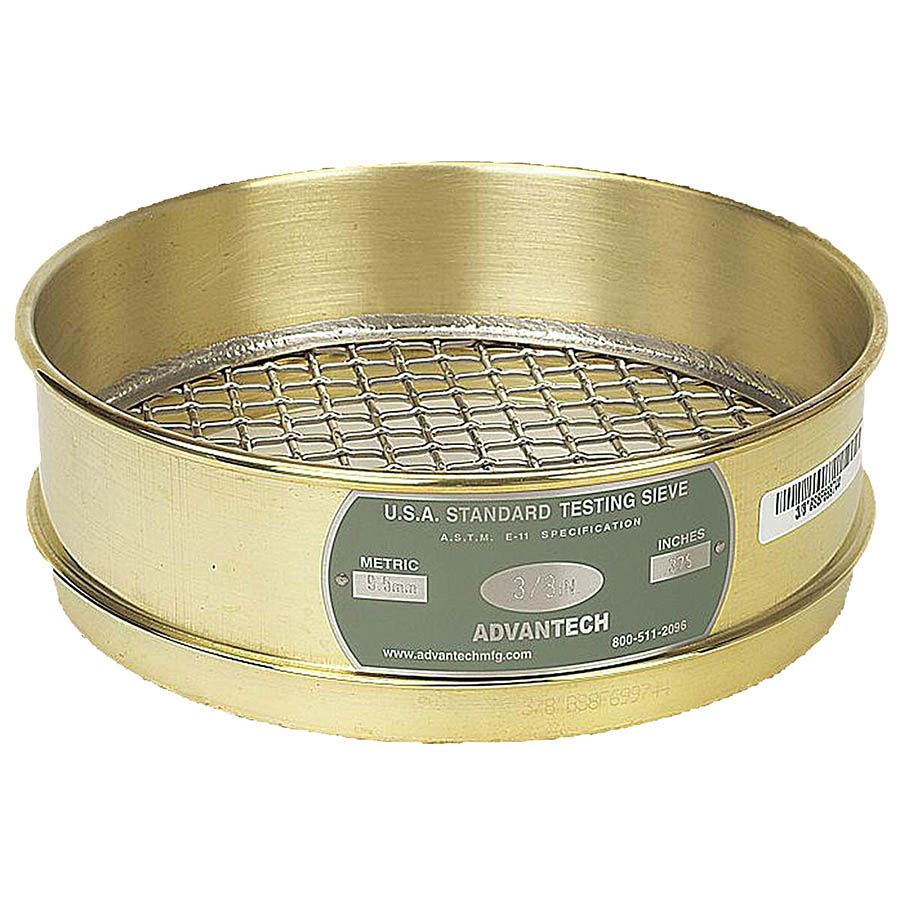
Next consider milling and mashing. It is imperative to get the correct ratio between husks, kernels and flour. Incorrect numbers will affect your mash time, temperature, flavor profile and yield. Just small adjustments to your milling can give 3–5% better yield. Incorrect ratios might also clog your system and alter your extraction. A control sieve, which divides the fractions by size, costs only a fraction of the one bad batch you might make. A traditional malt whiskey recipe would be 70% kernels, 20% husks and 10% flour. The process of this analysis can be done using sieve trays and a mechanical shaker. Sieve trays and shakers can be purchased from a number of different suppliers, including Gamut and WS Tyler. While the test is best performed by use of the shakers, hand-shaking the sieves can be an alternative economical option.
Both during mashing and fermentation it is important to control your pH. The acidity/basicity will affect your flavor profile, yield and equipment. The pH might be altered by your recipe formulation, the water you use or your yeast source. Metals in your process water might buffer your system to an unwanted value.
Testing strips are widely available from a number of sources, including your local homebrew/wine shop, Amazon.com and laboratory suppliers. Strips also serve an everyday practical purpose of checking your rinse water after CIP cycles to insure you have rinsed the tank/vessel to a neutral pH. However, the preferred method of pH measurement is the use of an electrode probe meter.
The Hanna Instruments “Cooling Tower” model gives you the capabilities of automatic temperature compensation, high range of temperature tolerance but also the durability of everyday use around the distillery. A key recommendation with regard to the probe is the flat-tip probe option. If you have ever measured the pH of a mash, you will quickly find the benefit of this versus the standard bulb option. When using a standard bulb option, the probe can easily become fouled or get bits caught around the probe resulting in errant readings.
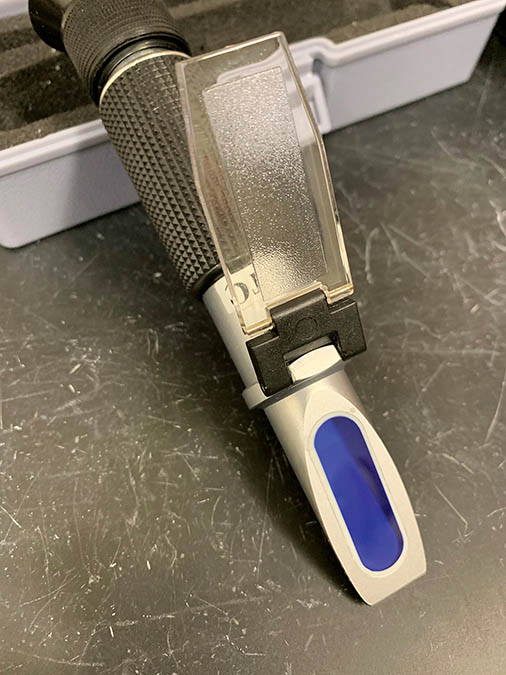
An iodine test (KI) of your wash for residual starch is a simple and accurate way of monitoring your conversion. The iodine test is straightforward: Simply take a sample of wort, place a drop on a white plate and add drop of iodine tincture to the wort. If the mixture turns black, starch is present and not yet converted to fermentable sugars. A small handheld refractometer helps you monitor your extraction from your plant material and your fermentation as a whole. This can be bought in any homebrew shop.
If you propagate your own yeast, work with different or multiple strains. If you have sour mash recipes and/or several generations you should buy a simple hemocytometer (a slide used to count yeast cells), some methylene blue and a better microscope (you need 400x magnification to see yeast). A hemocytometer can easily be purchased from vendors such as Cynmar for approximately $80.
This helps you with pitch rate, viability, checking yeast stress and efficiency. You can predict certain flavors by examining the active cells and stress level. Measuring dissolved oxygen could also be valuable to optimize your production and flavor profile. However, it is hard to find an economical option for measuring dissolved oxygen. You might be able to strike a deal with a local brewery that has one to do some basic trials. If you choose to purchase one for your own use, Hach’s Orbisphere is a reputable long-standing supplier of this instrument.
When moving into distillation, make sure your equipment is clean and serviced properly. Scaling from hard water or non-optimized media (i.e., acidic, mineralized or metal-rich water) in your boiler or chiller could create expensive problems. Test your heating and cooling media continuously. A simple color-change indicator test might save you thousands in repairs and efficiency. While this testing can be done in-house, a water technology company such as Guardian CSC offers service packages to monitor your boiler water as well as softener, de-ionization (DI) and reverse osmosis (RO) systems. If you choose to do this testing on your own you might want to consider purchasing a unit from the Myron L Company, Ultrameter II Series, Model 6PIIFCE for approximately $1,100 to $1,300. As with your still, a trained, competent operator is just as important as owning the piece of equipment.
During distillation, monitor your temperatures and ABV (often it is more economical to buy a handheld densitometer or NIR than a range of hydrometers that need to be calibrated every year), take notes and be sure to evaluate your cut points. After distillation, you are left with three products: First is your stillage (the stuff left in the still), the second is your new-make spirit and the third is your feints (the heads and tails run). All of these need to be monitored and controlled.
You need to make sure your waste stream is safe and compliant. You do not want to hurt the environment, your customers or the community. Also, there might be tough fines if you do something wrong. Challenges that you might face involve temperature, pH, metals, nitrogen compounds, etc. There are very simple and cheap tests you can conduct to check these parameters, such as indicator tests and reaction tests with spectrophotometers.
With new-make spirit, you need to make sure it fits your profile. Take the effort to send one new-make sample to a laboratory to do a generic scan. If your spirits are to be oak-aged, you need to control your diluting water. You do not want chlorine in there imparting off-flavors, and if you have excess iron in your water, that can taint your spirit and turn it black.
When bottling, you should check turbidity. A turbidity meter can come in both portable or benchtop options, such as those offered from Hach: 2100Q Portable Turbidimeter or the TL23 Series Laboratory Turbidimeter. An early signal to flocculation or haze could save you a lot on recalls. Also test-freeze and test-heat your product prior to bottling to see if that alters the product’s appearance. You want to control bottling ABV as well as filling level. Always check your filling level by weight; that is the only sure way. Table 2 gives a simple method of determining perfect fill of a 750 mL, 80-proof vodka with no dissolved solids, bottled by weight.
I have traditionally calibrated my perfect fill across 4 to 6 different glass bottle molds from my shipment. The bottle mold number is typically visible on the underside of each bottle. Since bottle manufacturing always has a +/- factor (as shown on the CAD drawings from your supplier), averaging your fill weights across multiple samples is a good demonstration of your efforts to maintain good practices. Procedurally, you start by weighing each of your 4 to 6 bottles empty and record the weight. Fill the bottles using your filler, then weigh again. The difference between your empty and your filled weight is your filling level.
If you have a colored product, you want to make sure that every bottle and bottling have the same color. To get accurate results make sure to measure ABV before adding sugar; also be aware that volume changes with sugar addition. Measuring solids with a moisture analyzer is a good way of checking sugar addition. The TTB has some great instructional videos on this (https://ttb.gov/spirits/proofing.shtml).
A method I have found worthwhile is the Velp Unit from Rudolph for distillation of the sample with dissolved solids (such as a liqueur). The unit has the ability to distill your sample consistently and accurately in as little as 8 minutes with just the push of a button.
Never Stop Learning
And lastly, never stop learning. Analysis is all about getting you to the next level: making a better product at a lower cost and with less work. Never stop educating yourself. Read trade literature, go to trade shows and conferences, take classes and talk to your peers. The most important tool in your lab is your own brain.


